Monday, April 30, 2012

Dresser With Chalk Paint, Come Back!!


Do you ever do those projects, that when you look back you think "I so should have kept that?"  I am doing that right now.  Awhile ago I showed you a dresser that I was working on for my shop space at Rusty Glamour, remember this?
Wow until I posted this again, I had forgotten what it looked like!  I was really drawn to this piece, the hardware was super cute!

For this dresser I mixed up my favorite concoction of homemade chalk paint (1tbsp of un-sanded tile grout+1 cup of paint).  The best thing about this paint is there is no need to prime first!   Even though it looks white, the color is actually Revere Pewter from Benjamin Moore (one of my favorites!) So I grabbed a brush and went to town!

If you haven't tried this before, remember it is scary to look at (I am sure you remember that console I did?) Don't worry your pretty little head!  It will turn out fabulous!

After a couple of coats, I grabbed the sander and went to town!  This paint sands like a dream....after that was all done I did a couple of coats of paste furniture wax.
Sorry these aren't the best of pictures, these were taken in the booth (it gets kind of tight every once in awhile, lol)
Well here is my problem, now I am re-arranging my house and just keep thinking of a hundred places I would love to have this dresser!  Oh well, I think she went to a really good home!  Hopefully they love her as much as I did!
Sharing with these great blogs:

Saturday, April 21, 2012

Thrift Ottoman Makeover

Hi All!  Sorry I haven't blogged super regular; just been so busy!  I am not sure about you but when the weather breaks around here-we all go crazy!  Everyone is outside playing.  My daughter said "Please, please can we go swimming today?"  Then when I said "No", she tried "How about the Slip N Slide?"   We settled for just playing with the hose (and I got the back porch cleaned at the same time BONUS).  Tonight we made our weekly trip to Costco, our kiddos fell asleep while we driving there, then when we were walking in we passed a Mom pulling her asleep daughter out of a cart.  Made my husband and I laugh...

I have squeezed in some projects that I wanted to share.  Hopefully you will see multiple posts from me this week (keeping my fingers crossed!)

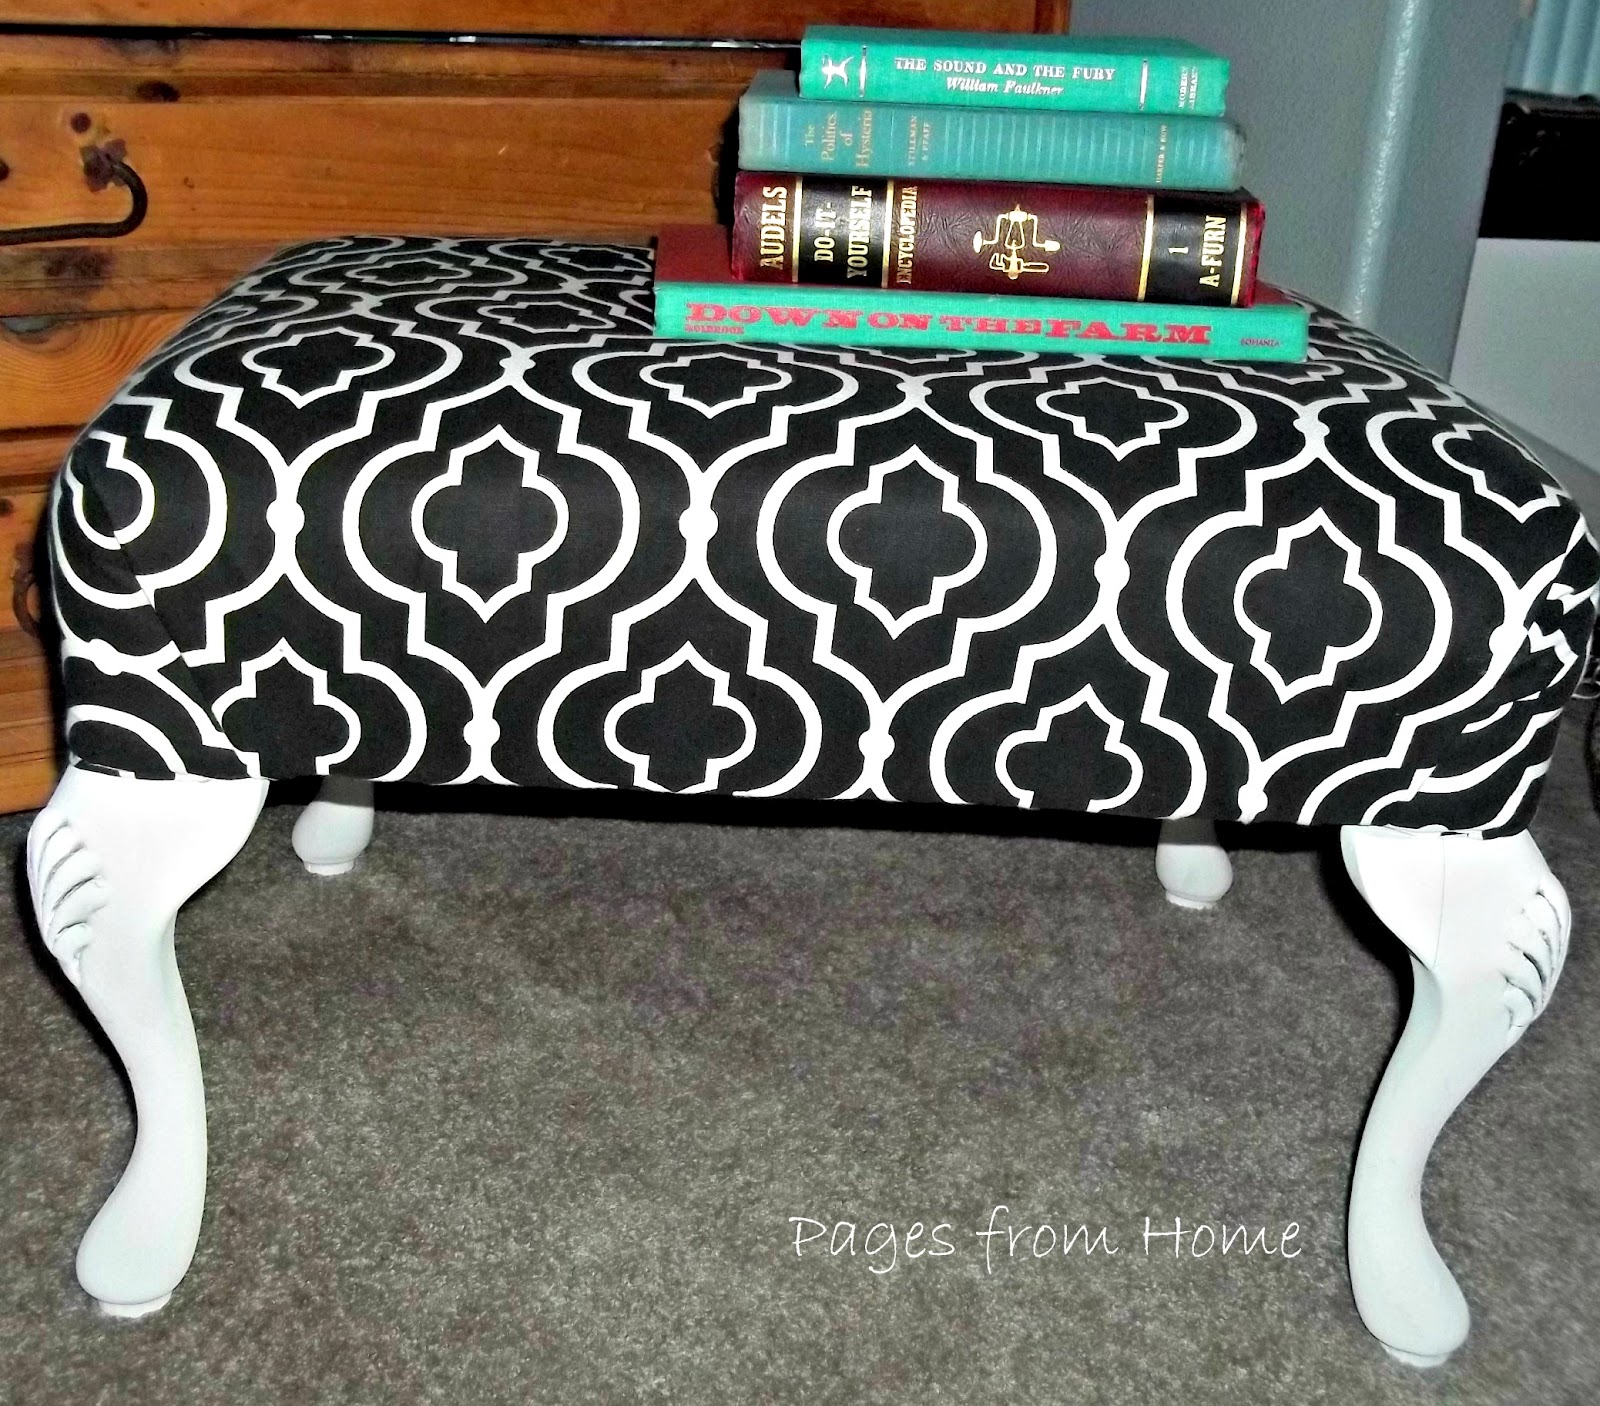
So check out this little ottoman I picked up.
Can you say EWWW?  I sure have been the entire time I have taken this apart!  It was so dirty, kind of grossed me out!  My husband spotted this when we were out and about, I said sure!  Silly me, I thought this would be easy to re-cover...I totally forgot about the removal process!  After I took out the couple hundred of staples along the bottom...see that little piping in the middle?  Yep, two more rounds of hundreds of staples!
When I started re-covering I forgot that I didn't save the batting from the edges.  Luckily I had this quilted tan fabric.  I improvised and cut strips and stapled it to the sides.

Well for all the work, I think it turned out pretty darn cute!
The little details on the sides were fun. I lightly glazed them to bring out the detail.

Do you like the print on the fabric?  Why is it so hard to decide when you are at the fabric store?  Crazy, usually when I pick out a paint color I grab and go...but me and fabric...we have issues!


My friend asked me to go to a plant sale with her this morning, she is one of those total green thumbs (you know the type, lol)  It was so fun, so fun in fact I have been in the yard all day working my bootie off!  I didn't go crazy at the sale, but my little green thumb buddy!?!?  She went a little crazy!
Here is just a tad, see she had to cram the rest in the backseat!  Crazy Lady!

Pretty stuff is popping up all over!  Hope you have been inspired to get some work of your own finished!

Have a great night!

Sharing on:

Sunday, April 8, 2012

Pretty Glazed Chair


What a beautiful Easter weekend we have had!  So thankful!  The kids played outside more than they have in a long time.  I love when they can hardly keep their eyes open when it is bedtime!

I got a little time to work on some chairs that I picked up awhile ago.  Here is what it looked like before. (Um yikes, please ignore that garage mess!)

I fell in love with the detail on the back of these chairs.  I was pretty lucky; and got three of these little beauties!  I have been searching for a project with a bunch of detail that I could use some glaze on.  Usually when I wanted to get the glazed look I just use wood stain. Lets face it-I had the stain on hand and was too cheap thrifty to go and purchase glaze!  Anyhoo-These are the perfect fit for a glazing project!

I painted the entire chair in a couple of coats of chalk paint.  Then I sanded it down to make it nice and smooth.  Isn't this green fun?  It is the color of one of my upstairs bathrooms-Retro Green!

I mixed the glaze with some black paint-I never measure-just kind of dump it in!

I had a damp rag handy, so after I coated the glaze on a section I just wiped it off with the rag.

Remember the wing back chair?  I had a little bit of fabric left; it was the perfect fit for this little project.

What a fun little chair!  I also painted on some little trinkets for my shop space at Rusty Glamour!
What a great weekend!  Hope you had fun too!
Sharing on:

Wednesday, April 4, 2012

Entry Closet Phase 1

I have this closet.  It is one of those thorns in my side, right when you walk in the front door.  The place we drop our shoes and coats.  When we are in a rush in the morning it is the place where I am digging, and digging for a matching pair of shoes for the kiddos! (oh yeah and sometimes for me too!)  Do you have one of those?

I purchased some trim boards, a long time ago specifically for a little work in this closet.  Guess where I put these boards?  Yep, in the closet.  So not only is it buried in shoes, now it has trim boards lining the ground-something had to give!  Here is what is looks like.
A nice cheesy coat rack, builder grade special!
Not so cute, I know!  Kind of embarrassing!  I took everything out this last weekend.  Then I started stacking the trim boards and measuring the wall.  I finally used my brand new mitre saw!  I had to put it together by myself!  My husband was helping my Dad do a few things, I was so wishing he was home.  I hate reading the instructions; I am way to impatient, I just wanted to use the dang thing!
I removed the ugly wire rack.  Then I caulked and puttied the seams on the trim boards.
I gave the boards a coat of my trim color paint, just a white high gloss.
Looking better!  So this is where I am now!  I need to paint the walls.  Add coat hooks to the trim boards.  Then I am thinking a little bench on the right had side?  I also need to decide how I am going to do the shoe storage!  In the back it is 4ft tall.  This closet is so strange, but thankfully it is pretty large!  I wraps to the left in the back as well!

So what do you all think?  My real decision is-Do I dare take the door off?  I really think it would open up the entry way?  Do you think it would be too messy?  Hopefully you all have some insight for me!

Have a great day!